Product Delivery Tracking
Product Delivery Tracking is functionality within the C****BC module that allows users to create, track and generate Routes, Manifests and entries for products and cash transactions based on state governing regulations regarding Cannabis and Cannabis related material. There are three facets of the **Delivery tracking module:
- Product Delivery Tracking
- Delivery Dispatch
- Cash Delivery Tracking
Product Delivery Tracking occurs on sales, purchase, and/or transfer documents for cannabis and cannabis related material. The delivery tracking functionality is controlled on how it is set up within the Cannabis Business Central Setup. The setup and its parameters can be reviewed here: CBC Setups
Delivery Dispatch within the CBC module pertains to the request, assignment and manifest documents for a delivery trip that then is attached to a sales or purchase order. The functionality design is controlled based on the Cannabis Business Central Setup. Within Delivery Dispatch, the user can suggest/create delivery trips based on Location, Salesperson/Purchaser, Sales Territory, Shipping Agent, Shipping Method, or Shipment Date. The user can also get delivery requests, assign/unassign delivery trips to sales or purchase orders and drivers, create shipping manifests and review posted or completed delivery trips.
Cash Delivery Tracking is a process like Product Delivery Tracking with the exception that the cash tracking only occurs on the posted purchase or sales invoice once the delivery trip has been completed. Cash Delivery Tracking is not integrated with the standard BC financial module. The purpose for Cash Delivery Tracking is to provide an audit trail for the movement of money from the time the driver leaves a facility with cannabis or cannabis related material, to the time upon return to the facility. The Cash Delivery Tracking functionality allows a user to accept a delivery, send a receipt or confirmation email, add payment methods, comments, and a signature of received payment.
How To: Accept Product Delivery on Purchase Documents with Advanced Warehousing
Open the Purchase Order where the Product Delivery needs to be accepted.
In the Action pane, click Actions / Warehouse/Create Whse. Receipt:

The created Warehouse Receipt will open.
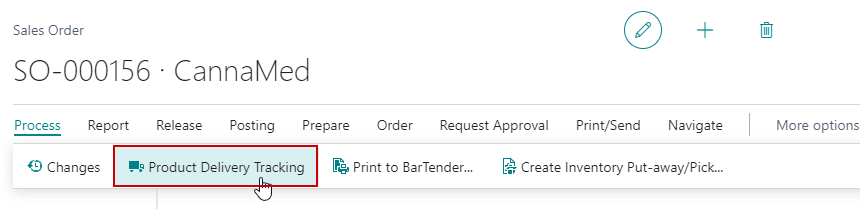
In the Action pane, click Process/Product Delivery Tracking:

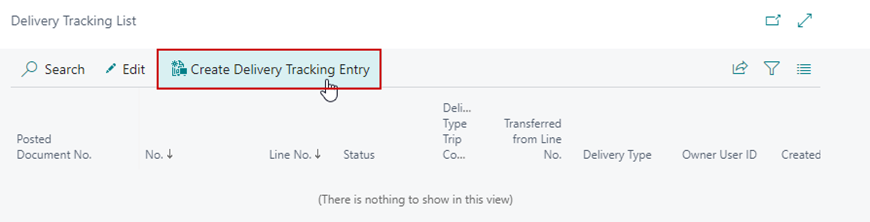
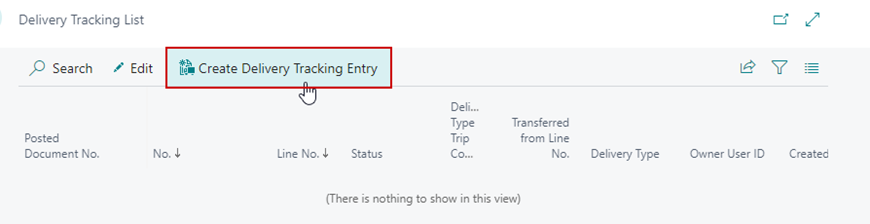
The Delivery Tracking List will open. To create the entry to accept the product, click Create Delivery Tracking Entry from the Action pane.
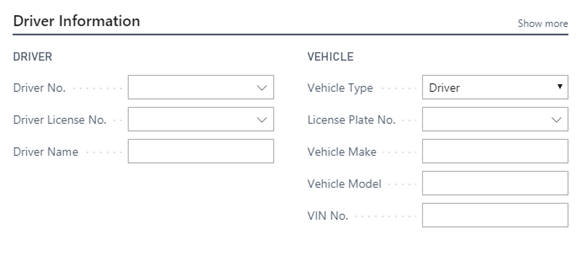
Enter the appropriate Driver No. on the Driver Information section of the Delivery Tracking Entry, the Driver and Vehicle information will automatically populate.

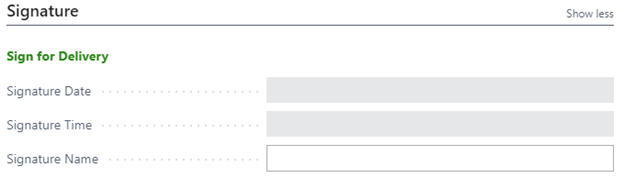
The Signature section has the following options:

a. Sign for Delivery: Click the Sign for Delivery link to open a page where the driver can sign and click Accept to save their signature to the Delivery Tracking Entry.
b. Signature Date: Automatically populated after the driver submits their signature.
c. Signature Time: Automatically populated after the driver submits their signature.
d. Signature Name: Enter the driver’s name.
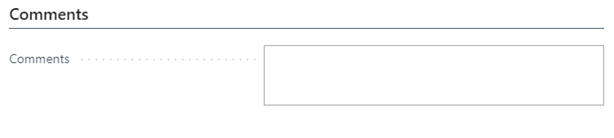
The Comments section allows the driver to enter in any comments they may have regarding the acceptance of the delivery:

Once the Delivery Tracking Entry has been filled out, the delivery can be accepted by clicking the Accept Delivery option on the Action pane.

The Delivery Tracking Entry will be accepted.
How To: Complete Product Delivery on Purchase Documents with Advanced Warehousing
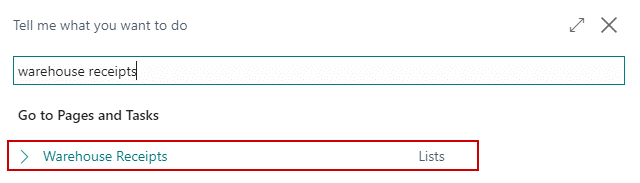
Click on the magnifying glass and enter Warehouse Receipts and click on the related link.
Open the related Warehouse Receipt.
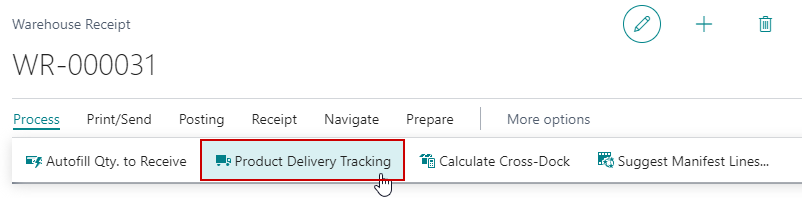
In the Action pane, click Process/Product Delivery Tracking:
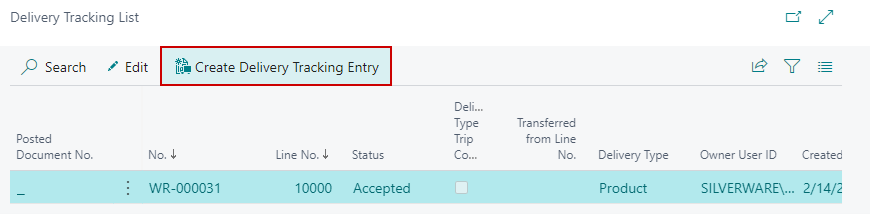
The Delivery Tracking List will open. To create the entry to deliver product, click Create Delivery Tracking Entry from the Action pane.
Enter the appropriate Driver No. on the Driver Information section Delivery Tracking Entry, the Driver and Vehicle information will automatically populate.
The Signature section has the following options:

a. Sign for Delivery: Click the Sign for Delivery link to open a page where the driver can sign and click Accept to save their signature to the Delivery Tracking Entry.
b. Signature Date: Automatically populated after the driver submits their signature.
c. Signature Time: Automatically populated after the driver submits their signature.
d. Signature Name: Enter the driver’s name.
The Comments section allows the driver to enter in any comments they may have regarding the delivery:

Once the Delivery Tracking Entry has been filled out, the delivery can be completed by clicking the Complete Delivery option on the Action pane:

The Delivery Tracking Entry will be completed.
How To: Accept Product Delivery on Sales Documents with Advanced Warehousing
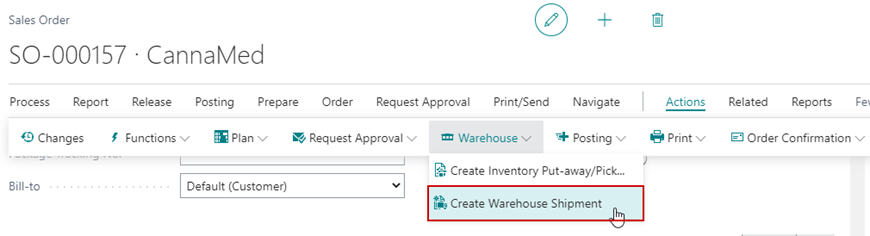
Open the Sales Order where the Product Delivery needs to be accepted.
In the Action pane, go to **Actions/Warehouse/**Create Warehouse Shipment:
A Warehouse Shipment will be created and automatically opened.
The shipment must be picked before the product can be accepted.
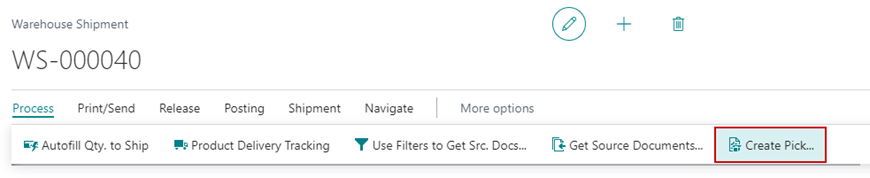
In the Action pane go to Process/Create Pick:
A dialogue with the following options will open:
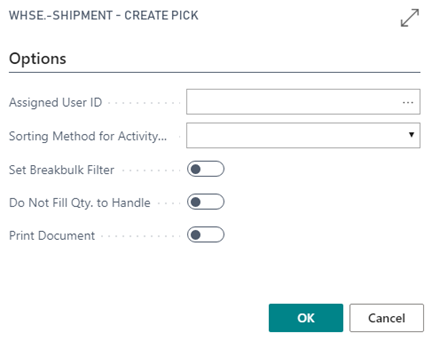
a. Assigned User ID: Select the Warehouse Employee from the drop down if you would like to assign a person responsible for completing the Pick.
b. Sorting Method for Activity: If you would like the Pick document to be sorted a specific way, an option can be selected.
c. Set Breakbulk Filter: If this option is selected then Breakbulk will be hidden on the Pick document.
e. Do Not Fill Qty. to Handle: If this option is selected then the Quantity to Handle on the lines of the Pick will be defaulted to zero rather than the quantity.
e. Print Document: If this option is selected then the Pick document will be printed.
f. Click OK to create the Pick.
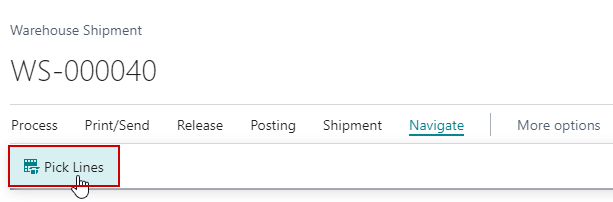
The Pick will not automatically be opened. To open it from the Warehouse Shipment, click Navigate/Pick Lines:
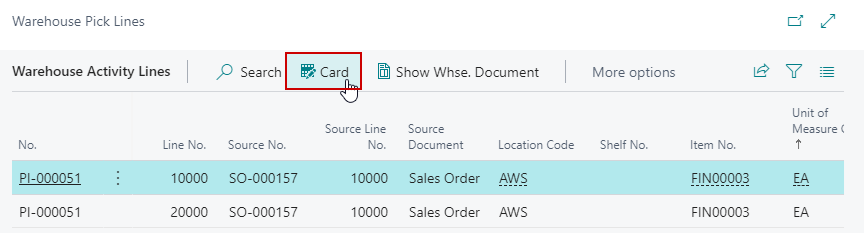
The Warehouse Activity Line list will open.
Select the appropriate Pick line and click Card on the Action pane.
On the Pick Lines, verify the following information:
a. The appropriate Bin is selected on the Take lines.
b. Select the appropriate CBC Tag No. on each line.
c. Populate the quantity being picked in the Qty. To Handle field.

In the Action pane, click on the Process/Register Pick:
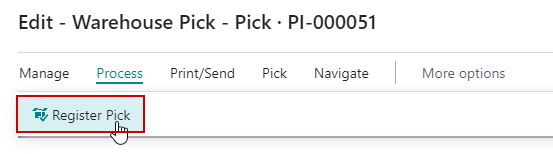
Click Yes to register the Pick.
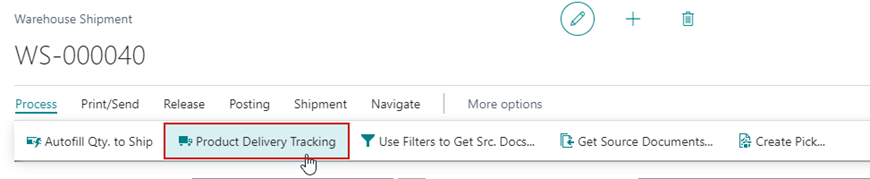
Navigate back to the Warehouse Shipment.
In the Action pane, click Process/Product Delivery Tracking:
The Delivery Tracking List will open. To create the entry to accept the product, click Create Delivery Tracking Entry from the Action pane.

Enter the appropriate Driver No. on the Driver Information section Delivery Tracking Entry, the Driver and Vehicle information will automatically populate.

The Signature section has the following options:

a. Sign for Delivery: Click the Sign for Delivery link to open a page where the driver can sign and click Accept to save their signature to the Delivery Tracking Entry.
b. Signature Date: Automatically populated after the driver submits their signature.
c. Signature Time: Automatically populated after the driver submits their signature,
d. Signature Name: Enter the driver’s name.
The Comments section allows the driver to enter in any comments they may have regarding the acceptance of the delivery:

Once the Delivery Tracking Entry has been filled out, the delivery can be accepted by clicking the Accept Delivery option on the Action pane.

The Delivery Tracking Entry will be accepted.
How To: Complete Product Delivery on Sales Documents with Advanced Warehousing
Open the Sales Order where the product delivery needs to be completed.
Go to Process/Product Delivery Tracking:

The Delivery Tracking List will open. On the menu, go to Process/Create Delivery Tracking Entry:

The Driver Information section of the Delivery Tracking Entry, information will automatically populate based on the previous Delivery Tracking Entry.

The Signature section has the following options:
a. Sign for Delivery: Click the Sign for Delivery link to open a page where the driver can sign and click Accept to save their signature to the Delivery Tracking Entry.
b. Signature Date: Automatically populated after the driver submits their signature.
c. Signature Time: Automatically populated after the driver submits their signature,
d. Signature Name: Enter the driver’s name.
The Comments section allows the driver to enter in any comments they may have regarding the acceptance of the delivery:
Once the Delivery Tracking Entry has been filled out, the delivery can be completed by clicking the Complete Delivery option on the Action pane:

The Delivery Tracking Entry will be completed.
How To: Override the Posting Date when accepting Product Delivery on Sales Orders
Open the Sales Order where the Product Delivery needs to be accepted.
Verify the Sales Order is released and go to Process/Product Delivery Tracking:
The Delivery Tracking List will open. Click Create Delivery Tracking Entry on the menu:
The Driver Information section of the Delivery Tracking Entry, information will automatically populate based on the previous Delivery Tracking Entry.
The Signature section has the following options:
a. Sign for Delivery: Click the Sign for Delivery ink to open a page where the driver can sign and click Accept to save their signature to the Delivery Tracking Entry.
b. Signature Date: Automatically populated after the driver submits their signature.
c. Signature Time: Automatically populated after the driver submits their signature,
d. Signature Name: Enter the driver’s name.
The Comments section allows the driver to enter in any comments they may have regarding the acceptance of the delivery:
The General section holds general information about the Delivery Tracking Entry and allows the user to select a new posting date by populating the Override Posting Date field. If the posting date was overridden on the Acceptance Entry – the same date will come in on the Completion Entry:

Once the Delivery Tracking Entry has been filled out, the delivery can be completed by clicking the Complete Delivery option on the Action pane:
The Delivery Tracking Entry will be completed.
How To: Override the Posting Date when completing Product Delivery on Sales Orders
Open the Sales Order where the Product Delivery needs to be completed.
Go to Process/Product Delivery Tracking:
The Delivery Tracking List will open. On the menu, go to Process/Create Delivery Tracking Entry:
The Driver Information section of the Delivery Tracking Entry, information will automatically populate based on the previous Delivery Tracking Entry.

The Signature section has the following options:

e. Sign for Delivery: Click the Sign for Delivery link to open a page where the driver can sign and click Accept to save their signature to the Delivery Tracking Entry.
f. Signature Date: Automatically populated after the driver submits their signature.
g. Signature Time: Automatically populated after the driver submits their signature.
h. Signature Name: Enter the driver’s name.
The Comments section allows the driver to enter in any comments they may have regarding the delivery:

The General section holds general information about the Delivery Tracking Entry and allows the user to select a new posting date by populating the Override Posting Date field. If the posting date was overridden on the Acceptance Entry – the same date will come in on the Completion Entry:

Once the Delivery Tracking Entry has been filled out, the delivery can be completed by clicking the Complete Delivery option on the Action pane:

The Delivery Tracking Entry will be completed.